Maintenance Task Lights: Magnetic, Hanging or Corded
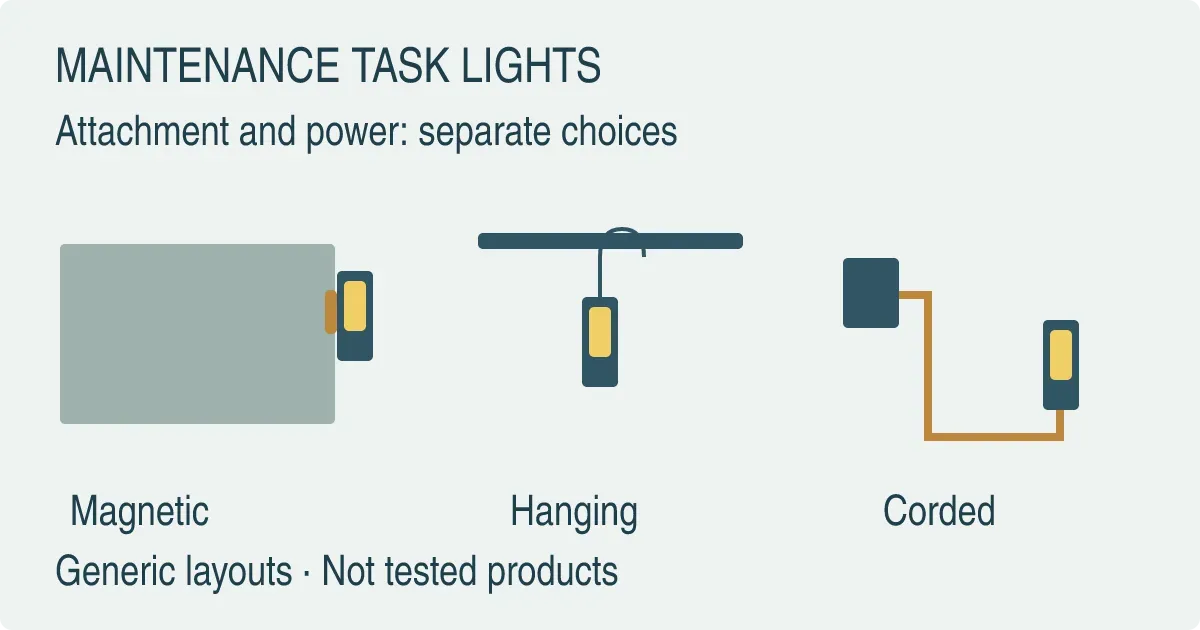
This guide helps you specify an LED work light that is rechargeable and magnetic, a hanging inspection lamp or a corded alternative for maintenance. Its output is a mounting-and-power record you can compare with a supplier’s manual. For broad area coverage and stands, use the portable work light buying guide; the power and lighting hub puts both tasks in context.
| Input or item | Typical value or source | Why it matters |
|---|---|---|
| Attachment point | Photograph and material of the actual equipment surface | A magnet needs a suitable contact surface; a hook needs a suitable support |
| Viewing position | Location of the repair, hands and tools | The lamp must illuminate the task without occupying the working space |
| Power route | Outlet-to-lamp route or charging arrangement | Cord length and battery charging solve different problems |
| Attachment evidence | Exact model manual and manufacturer clarification | A magnet or hook description may omit a numeric load rating |
| Exposure | Site conditions and permitted operating configuration | A lamp’s IP code does not specify every part of its charging setup |
Separate the attachment choice from the power choice
Select a support point that leaves your hands free, then decide how the lamp will receive power. A rechargeable lamp can hang from a hook; a mains lamp can use magnets. Treating these as three mutually exclusive products can hide a useful combination.
Start with a photograph of the closed-down maintenance position, taken under your site’s safe-work procedure. Mark the component you need to see, the available attachment points and the route your hands and tools will take. A position that looks convenient before opening a panel may block access afterward. This is a procurement sketch, not permission to work on energized or moving equipment.
| Arrangement | Useful starting condition | Question that can reject it |
|---|---|---|
| Magnetic attachment | A suitable stationary surface is near the task | Does the specified magnet make the required contact in this orientation? |
| Hanging attachment | A suitable support accepts the intended hook | Can the lamp stay aimed without obstructing access or loading an unsuitable part? |
| Corded power | A compatible supply and protected route reach the position | Can the cable stay clear of damage and the work path throughout the task? |
The equipment RFQ guide helps convert those observations into a request. Describe the support and route rather than asking only for a “heavy-duty” lamp.
Takeaway: Specify attachment and power separately so the comparison includes workable combinations.
Read three model documents without treating them as a ranking
Documented mounting features are useful, but they do not establish a numeric holding load. The following examples illustrate what a buyer can and cannot extract from manuals and the manufacturer’s current product pages, checked on October 7, 2026. All three are SCANGRIP models; this is a document exercise, not a market survey or endorsement.
| Exact model | Manufacturer’s attachment description | Cable and power distinction | Manufacturer’s IP claim |
|---|---|---|---|
| UNIFORM 03.6208 | Built-in magnet and turnable hook | Rechargeable; product page lists a 1 m USB charging cable | IP65 |
| MINIFORM 03.6207 | Built-in magnet and hook | Rechargeable; product page lists a 1 m USB charging cable | IP65 |
| SUPERFORM 03.5406, EU configuration | Two built-in magnets and two turnable hooks | 5 m mains cable, 2 × 1 mm² H05RN-F; product page specifies a Type F plug | IP54 |
Sources: the three linked manufacturer entries in Sources, each with its downloadable manual. The SUPERFORM manual puts the cable and IP information on its opening specifications page; the rechargeable manuals identify their protection ratings and charging instructions. The 1 m lengths come from the rechargeable product pages, not from an assumption about the cable pictured in the manuals.
Numeric magnetic holding force and hook working-load limits are not published in the documents reviewed for these three examples. Record that as “not stated,” not zero and not an estimated capacity. The phrase “strong built-in magnet” on the UNIFORM page is a qualitative manufacturer description. It does not provide a pull-force test, a side-load limit or permission to hang other tools from the lamp.
Common mistake: copying a product’s own weight into the hook-load field. Weight describes the product; it does not establish the attachment’s rated capacity.
Ask the manufacturer about the intended orientation and surface before accepting a mounting arrangement. Keep the reply with the exact model and revision, using the supplier test-report checklist to distinguish a supported claim from a catalog adjective.
Takeaway: Keep published features, measured claims and missing attachment ratings in separate fields.
Check magnetic contact at the intended position
A magnetic mounting decision starts with the actual contact geometry. Record the surface material, curvature, coating and available contact area, then ask whether that combination is within the manufacturer’s intended use. A large-looking steel component does not establish that the lamp’s entire magnetic foot will sit against it.
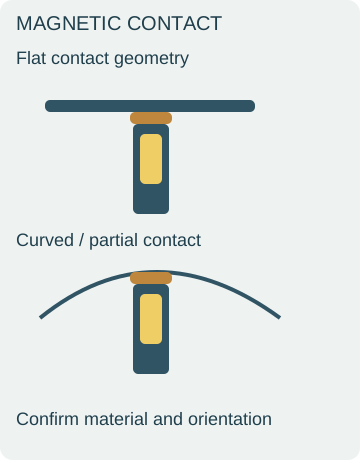
Mark the proposed position on the photograph rather than writing “magnetic base required.” Include whether the lamp must be sideways or inverted and whether its head needs to articulate. An aiming adjustment may change where the body sits, so consider the attachment with the head in the working position.
Our suggested receiving check is to compare the delivered mount with the documented configuration in a controlled, nonhazardous setup. Do not improvise a proof-load test or place a person beneath an unverified mounting arrangement. Have the site’s responsible person approve the intended use before putting the lamp into service.
Takeaway: Give the supplier the contact geometry and orientation, not merely the word “metal.”
Check the hook support and the beam together
A hook must fit the intended support and leave the lamp aimed at the task. Check both in one sketch: a hook that fits but lets the lamp face away from the component has not solved the lighting problem.
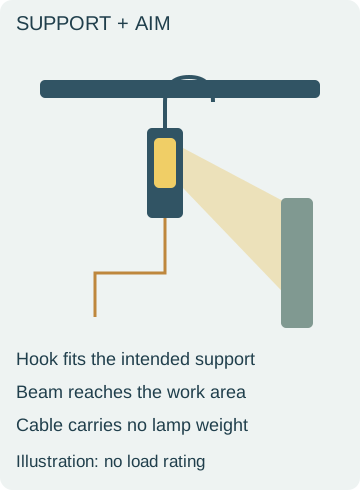
Record the support shape, clearance to install and remove the hook, and the lamp’s position after it hangs. Ask whether the manufacturer permits that support and orientation. Do not use a convenient hose, wire or movable machine part as a substitute for an approved support.
Also identify what happens when a technician changes stance. A lamp may be secure yet cast a shadow from a hand or tool exactly where the work occurs. Request a demonstration of aiming and access with the equipment safely out of service. The demonstration should answer your task question, not become an unsupported comparison of published lumen totals.
Takeaway: Accept the hanging arrangement only after support and useful aiming have both been checked.
Route a cord before deciding its length is enough
Measure along the permitted cable route, including the approach to the lamp, rather than taking a straight-line distance from the outlet. Identify sharp edges, heat sources and places where the cable could be pinched or struck. The SUPERFORM manual specifically calls for protecting its mains cable from oil, heat and sharp edges.
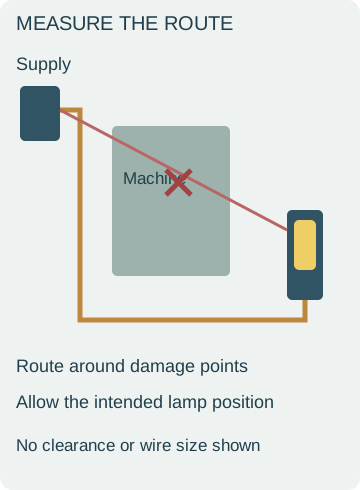
The SUPERFORM EU example shows why the exact configuration matters: its product page specifies a 5 m cable and Type F plug. That is not a recommendation for a US outlet or a reason to improvise an adapter. Confirm the locally supplied version and its connection before purchase.
For US general-industry workplaces, OSHA 1910.334(a) covers portable cord-connected equipment. It addresses handling, inspection for damage and equipment appropriate to conductive locations. It prohibits using an attached flexible cord to raise or lower equipment. This guide does not determine which electrical protection your particular installation requires.
Common mistake: treating a USB charging cable as evidence that a rechargeable lamp can run indefinitely while plugged in. Charging capability and permission to operate during charging are different facts to confirm.
Use the IP-rating guide to interpret protection claims and the temporary construction lighting guide if the real task is broader construction-site lighting. A sheltered workshop task and a construction lighting installation have different scopes.
Takeaway: Choose the supply configuration and route first; compare the stated cord length afterward.
Keep a receiving record that another shift can use
Keep one record per selected model and intended task. The record should show why the mount, aiming and power arrangement were accepted, as well as unresolved questions that stop deployment.
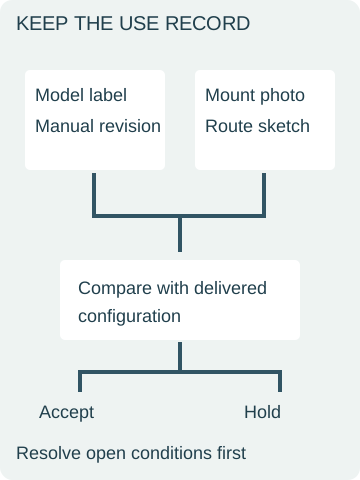
| Record item | Evidence to keep | Hold the item when |
|---|---|---|
| Identity | Model label, regional version and applicable manual | The supplied configuration differs from the quoted one |
| Attachment | Manufacturer instructions and intended-position photograph | The support or orientation remains unconfirmed |
| Power | Required supply, charger or battery details and route sketch | A compatible supply or permissible route has not been established |
| Condition | Receiving inspection and damage report | A damaged part could expose a user to injury |
| Handover | Approved task, storage location and responsible contact | Users cannot find the instructions or distinguish a held unit |
Put follow-up inspections into the existing equipment maintenance plan. If lights travel between locations, the equipment-case checklist helps plan protection during transport; it does not upgrade the lamp’s own ingress rating. Keep the completed record with your checklists and templates rather than relying on a box that may be discarded.
Takeaway: Retain the model-specific evidence with the intended use, so a different shift can repeat the decision.
When this does not apply
This guide concerns ordinary close-range maintenance selection. It does not approve a lamp for explosive atmospheres, live electrical work, submerged use, overhead lifting or attachment to moving equipment. Hazardous-location classification and the site’s safe-work procedures take precedence over a generic purchasing comparison.
IP codes alone do not establish chemical resistance, attachment strength or safe charging in a wet location. For example, the MINIFORM manual instructs indoor charging at 5–40°C even though the lamp carries an IP65 claim. Apply each instruction to the part and operating state it actually describes.
We have no attachment-force, drop, runtime or field-use test results for these lamps. Missing hook and magnetic load figures remain questions for the manufacturer, not claims supplied by this article. The three examples also do not establish US availability or local electrical approval.
Takeaway: Refer uses outside ordinary maintenance selection to the applicable manufacturer and site requirements.
Frequently asked questions
Can I choose a rechargeable work light without joining a power-tool battery system?
Yes, a self-contained rechargeable design is a separate option. Before choosing it, establish how the battery can be serviced and whether a suitable replacement is actually available for the exact model. The MINIFORM manual calls for an original replacement battery; it does not authorize substituting any cell with a matching nominal voltage. This addresses ownership and service support rather than tool-platform compatibility.
Does a lamp supplied with a charging cable also include the charger?
Check the contents list separately. The UNIFORM and MINIFORM product data distinguish the cable from the charger and list “Charger included: No.” A receiving checklist should identify the compatible supply needed before the lamp is issued; a familiar connector shape does not complete that check.
What should I ask about if charging ports or covers keep breaking?
Ask which parts are replaceable, who performs the repair and what condition requires withdrawal from use. A generic spare-parts statement does not identify a replacement port or seal for your model. Record the actual failure description for the supplier, rather than assuming another IP number will fix a mechanical service problem.
Should brightness adjustment be gradual or use fixed steps?
Choose according to the control you need at the task, then verify the controls in a demonstration. If fine adjustment is essential, specify that explicitly instead of accepting any product described as dimmable. The MINIFORM manual specifies three levels and describes a saved brightness setting. That example provides stepped control, so it does not meet a request for continuous adjustment.
How can I check whether a folding lamp fits my tool-bag pocket?
Measure the pocket opening and usable depth, then compare the lamp in its carried configuration, including any protruding hook or clip. Request dimensions or a sample for that configuration. A closed lamp that fits may still be awkward to remove with gloves; assess access separately from volume.
Do I need both a spot beam and a broad work-light beam?
Only if the tasks justify both. List a distant identification task separately from a nearby component inspection, then check whether one lamp can address both without an awkward grip change. Two named modes are not proof that both are useful for your task; the working distance and viewing angle still need confirmation.
Method and question sources
SavvySkull prepared this guide with AI assistance from the manufacturer’s current product pages and their linked manuals, plus the cited OSHA provision. It is documentary research, not hands-on testing, a retailer recommendation or an independent product certification. Our editorial policy explains that distinction.
Five original illustrations show mounting geometry, support, route and record structure. None shows an actual tested lamp. The examples intentionally preserve missing numeric attachment ratings, and the comparison uses one manufacturer’s documents rather than implying comprehensive market coverage.
The FAQ topics respond to real community requests about battery-system independence, charging accessories, damaged lights, brightness adjustment, bag-pocket fit and combined spot/work beams. These are question sources, not evidence of product performance. Four were available as indexed title or excerpt only during this review; the brightness and pocket-fit discussions were readable. Manufacturer documents supply the product facts.
Takeaway: Use the document comparison to ask precise questions, and retain unresolved mounting conditions before issuing a lamp.
Sources and versions
- UNIFORM 03.6208: product data and linked manual , SCANGRIP Supports: Model-specific magnet/hook features, IP65 and 1 m USB charging cable; manual charging restrictions. Manufacturer claims.
- MINIFORM 03.6207: product data and linked manual , SCANGRIP Supports: Model-specific magnet/hook features, IP65 and 1 m USB charging cable; manual battery and charging instructions. Manufacturer claims.
- SUPERFORM 03.5406 EU: product data and linked manual , SCANGRIP Supports: Two magnets/two hooks, 5 m mains cable, Type F plug and IP54; manual cable protection and nonreplaceable cord. Manufacturer claims.
- 1910.334: Use of equipment , OSHA Supports: US general-industry portable cord-connected equipment handling, inspection and location requirements; not a complete electrical compliance review.
Next steps

Portable Work Lights: A Buying Guide for Outdoor Teams
How outdoor teams can compare portable work lights: lumens vs lux, beam pattern, runtime claims, mounting, protection ratings, plus a supplier comparison sheet.

How to Write an RFQ for Outdoor Equipment
How to write a request for quotation for outdoor equipment: measurable requirements, documents, commercial terms and a response table that makes quotes comparable.

How to Check an Equipment Supplier’s Test Report
How to check a supplier's equipment test report: document type, issuer, model and sample match, scope, conclusions, accreditation, plus a downloadable record.
Outdoor Equipment Maintenance: Building a Practical Schedule
Build an outdoor equipment maintenance schedule from model manuals: equipment register, trigger types, task types, roles, records, and a downloadable template.